
Welcome to my short journal on my welding classes.
The intention of this journal is to simply document a beginner's experience with Welding and perhaps give other beginners some insight to what they might experience when taking a similar course. All entries will be paraphrased and aren't exactly as presented in class, yet should hold true to the intended educational objective.
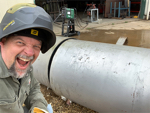
I am taking this course through my county's Vocational Technical School. The evening classes are geared towards adults looking to learn a trade and my class runs the gambit in regards to it's attendees and their purpose for being there. My reason is to learn basic, safe fabrication using various metals and gain a proficiency in doing so to the extent that I may ultimately fabricate what I need to build a smoker. The instructor is open to students bringing in projects (smaller) towards the end of the class to work on.
The classes are Tuesdays and Wednesdays from 7-10PM, from MArch 20th through June 12th... total of 20 classes.
Class 1: Intro.
Objectives:
Course Overview
Student Introductions (shooting the "fecal matter"
Briefing on Saftey
Instilling the Fear of God in you about what can happen to you if you do stupid things in the shop

and building an inventory of what you will need for class
Highlights: Shop Tour and seeing some of the work the high school students are doing. (will try to post pics here)


Next Class: March 21; Oxy-Acetaline cutting